Showing posts with label mixed media. Show all posts

Thursday, January 14, 2016

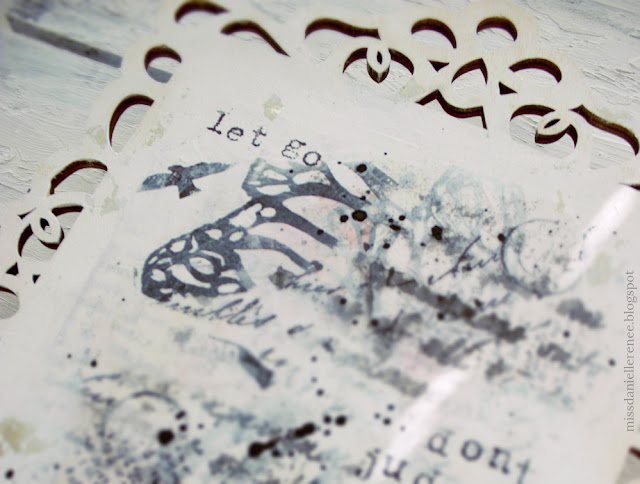
Mixed Media Room Sign - Let Go


Lately, I've been on a quest to "find my artistic style".  I don't really even know what that means.  I was on the internet reading about why artists should have a cohesive body of work.  UGH!  After reading the article was so depressed.  I think it's cause I like to jump all over the place.  And you know what.  It makes me happy.


Since college I've been trying to fit into this imaginary mold.  I'm over it.  Trying to create in a mold stops my progress.  I mean over the past week I've barely painted anything because I'm so busy analyzing.  I wonder sometimes if I secretly want to impress people as opposed to doing art that makes me fulfilled.


So, I made this sign which is hanging by my painting area so I can remember to stop judging so harshly and just create.  How about you?  Do you feel the pressure to impress?


Supplies: Art Minds wooden plaque (no longer sold); StazOn Black Ink; Ranger Foil Sheets
Handmade stamps; Super Vintage Prima stamps (no longer sold)
Friday, September 4, 2015

Mixed Media Decor in 10 Steps with DecoArt

Hey Friends,
We made it though another week!  Today I'm exited to share a mixed media project I created with DecoArt acrylic paints.  I decorated a wooden table sign I picked up from Hobby Lobby.  I hope you are inspired and are able to use these techniques in your own projects.


I pretty much broke my process down into 10 steps.  Most steps are self explanatory but I wanted to give you a reason behind why I do what I do!  

1. Gesso - I like to prime whatever I'm working on the accept paint.  
2. Stamp - This step instantly adds texture to the background.  Larger stamps cover more surface.
3. Collage -  Tissue paper with text is my go-to mixed media staple.  I adhere with matte medium.
4. Paint - I mixed a lot of the colors to create different values.  
5. Drip - I like to use a bright or bold color when dripping paint to help break up the background.
6. Stencil - Find a light area and stencil dark colors then find a dark area and stencil light colors.  
7. Paint Some More - At this step I was making space for my focal point by adding white. 
8. Add Focal Point -  Your focal point can be subtle or strong.  I went bold for this project.
9. Splatter - After I splatter I like to dab some areas with a paper towel to create a faded look.
10. Finishing Touches - At this point do whatever you feel the project needs.  I added a bit more color to the background and painted the base.


Colors used: Americana Antique White
Americana Jack O Lantern Orange
Americana Banana Cream
Americana Black Plum
Americans Bright Yellow
Americana Lamp Black
Americana Bahama Blue
Americana Forest Green
Americana Berry Red

Please enjoy my process video!  Grab some some supplies and paint with me.


To learn more about DecoArt products please visit DecorArt.com.  

Thanks so much for visiting my blog.  If you liked this post please share it and click the follow button in the side bar for weekly mixed media inspiration!

Wednesday, August 12, 2015

Tim's 12 Tags of 2015 ~ August Mixed Media Tag

tims 12 tags of 2015

Have you ever been to NYC??  Not me (not yet anyway).  I would love to go one day and now that I live on the east coast (kinda) I feel closer to getting there.  Anyway, here is my twist on Tim's tag...


I kept the color palette muted which is different for me because I love color.  The tag came together so fast I wanted to make another but didn't get a chance.  I made a new stamp and was happy to use it!  It's the cross on the middle right side.  

This project is really simple and gave me comfort as I work on it.  In my last post, I briefly talked about moving to Georgia.  Homesickness is starting to set in and getting used to a new place is stressful. I'm taking it one day at a time. 


On a lighter note, I have my studio space set up and started a small series of paintings.  I hope to post to my ETSY by the next week.  My giveaway is open until 8/15 so click here to find out how to enter!

If you liked this post you can follow my blog for weekly updates & my monthly newsletter for upcoming projects.  Have a blessed day!

Follow

Friday, June 5, 2015

Mixed Media ATC Swap & WOYWW

Do you swap your artwork with other artists?  I've been doing swaps for a long time and always get exciting to create for someone else.  I joined a FB group called Artists' Lounge.  You are able to sign up for a theme you like, make something, and swap it!  For this exchange, the theme was feathers.


The background is modeling paste with my fav doily stencil from Prima.  I painted the feathers, cut, and mounted them.  I was going for something with a relaxed vibe.  Hope she likes them.


This is my very first WOYWW (what's on your work desk Wednesday).  Earlier this week I was working on a new journal.  When I paint faces I like to use other paintings for reference.  I have a random light bulb and freshly gessoed journal page ready go!


Also sharing with Paint Party Friday/Frilly & Funkie.  P.S Don't forget to stop by Kristin's blog for SOC (summer of color).  This will be my first year joining in on the creative color prompt challenge but I'm looking forward to it!  Have a great weekend!


Thursday, May 14, 2015

How To Create a Mixed Media Tag - Online Art Class


Today I'm happy to be launching my first online (mini) class.  I've wanted to do something like this for a very long time.  I love teaching in person so I figured why not share my teachings online.  The instructions with take you from start to finish of the tag in the photo above.


This class is great for beginners who would like easy step by step instruction as well as the experienced artist who would like a glimpse into my creative process.  Click here and you will be taken to my ETSY shop where you can download the class PDF.


The online class has lots of photos, tips, and tricks!  I have also included four additional variations on the same techniques for inspiration.


I would like to know...if you make altered tags what do you do with them once you are finished?  I like to trade, gift, and display them.  Visit my ETSY page and follow me for future classes and artwork.


Friday, March 6, 2015

Altered Clipboards

Good Morning, last week I put the final touches on two altered projects.  

altered clipboard

I used my favorite stencils and mixed media mediums on this one.

altered clipboard

I was really just experimenting at first and then I decided to push it as far as I could.

altered clipboard

back

altered clipboard

The second one I made is more abstract then the first.  I didn't want to be confined.

altered clipboard


altered clipboard

I chose to write "today is a new day" because I want to be able to start fresh each day.

back

Both items are now available on my ETSY.  Please hop over and check it out.  
Hope you have a creative weekend!


Friday, August 1, 2014

Friends Mixed Media Card - CMS #67

Good Morning,
I have another DT entry for Color Me Scrappy!  I haven't art journaled in a while and I think I'm having withdrawals.  So, I created a mixed media card for this weeks challenge.  Watercolor paper is my favorite to work on because it's so strong.  I then adhere the paper to a pre-folded card.  I'm pretty sure purple is my favorite color and such is the dominate color on my card.


I would love to know what you have been creating lately so leave me a comment below. 
Please head over to Color Me Scrappy and join us for this color inspiration challenge.


Also sharing with Paint Party Friday

Materials: Watercolor paper, watercolors, acrylics, Prima Stencils/stamps
Tim Holtz stencils, Michael's wood pieces, washi tape, Martha Stewart stamps  

Embrace Life Mixed Media Card - S&P #7

Do you feel like you have embraced your life?  It all sounds so cliche right?  Personally, I feel like embracing life is like chasing down a skunk...once I get close to grab her she sprays poison all over me.  LOL! Well, it's not poison all the time.  Sometimes, we have to put up with the bad in order to reach the good.

I would love to make a living just creating art but I work retail during the day to support myself.  At the end of the day I thankful to have a job.  I'm more thankful for art and feel blessed to be an artist.  I think my freedom of creativity allows me to embrace life.


Here is my DT entry for Scrap & Play.  I went all mixed media with this card.  
Our challenge was the use the mood board as inspiration.  
Please join us over at Scrap & Play for this weeks challenge.


Sharing with Paint Party Friday

Materials: Watercolor paper, watercolors, acrylics, Heidi Swapp stencils
Tim Holtz stencils/tissue tape, Melody Ross word stickers, feather butterfly  

Monday, April 28, 2014

5 Ways to Complete Your Art Journal


Do you have unfinished art journals hanging around?  I often get comments from readers that they are unable to finish their journals.  Today, I want to share five things I like to do to keep my journal active.

1.  Paint in your background with one color and a few stencils.  I'm less likely to stare at a page when it's got some color and texture down.  Now you are ready for stamps, tapes, sprays, and journaling.


Here is the finished page.  You can't really see the background anymore but when I filled in my background it allowed me to get my creative wheels turning.  My idea was to create 
a clothes line of words I want to identify myself with. 


2.  Write a short, uplifting message to yourself.  I like to write things that make me happy and breathe hope.


3.  Keep it simple.  Your journal pages don't have to be complex.  Relax and pick one idea or emotion to focus on.  I created this page about moving to a new city and starting over.


4.  Travel with your journal.  Get up and take your journal outside or to the coffee shop.  You will be surprised at how quickly a page comes together when you are in a different environment.


5.  Leave it open.  I kept my journal open on a page I needed to fix and I finally couldn't look at it anymore!  So, I was forced to fix it.


I hope some of these tips help you complete your art journal.  Crack them open and create!

If you are working in your journal I'd love to see it - leave your link in the comments below.

Don't forget to share this post and visit my Facebook page.  See more of my art journal.

Linking to Paint Party Friday - Creative Every Day - Art Journal Every Day - Inspire Me Monday

Thursday, April 10, 2014

Inspired Vintage


I made this tiny shadow box a while ago.  I love how toile fabric tells a story.


I used postcard craft paper and lots of crackle paint around the edges.  
The dress and birds are cut from the fabric.  I kept the project fairly simple.


Thanks for stopping by!

Tuesday, April 1, 2014

Tim's 12 Tags of 2014 - April

I hardly ever get a chance to join in on Tim Holt's 12 tags so I jumped in for April.  


I don't have any dies or die cutting machines so I pulled out my Heidi Swapp stencil which looks a lot like the Trellis Sizzix die.  After I covered my tags with Tim's French Industrial paper and tissue/washi tape I used antique linen distress ink to distress my tags.  I wasn't able to get the mottled effect when I sprayed the water on.  Maybe I didn't use enough ink?

I used a palette knife to spread my Liquitex gloss gel through the stencil.  You will know the gel is dry when it becomes clear.
Next I spread my acrylic paint in between the raised areas and used a wet paper towel to wipe the excess (a baby wipe probably works better).  I did this a few times to build up the paint.


Here is what I was left with.


Thank you for stopping by!